Quick Start Guide
Your first successful subscription in 15 minutes. No theory, no edge cases — just momentum.
Step 1: Create Your Account
- Go to BillHive and click Sign Up.
- Enter your email, set a password, and verify your email.
- Log in to your BillHive dashboard.
You’re in. Let’s build.
Step 2: Create a Product & Plan
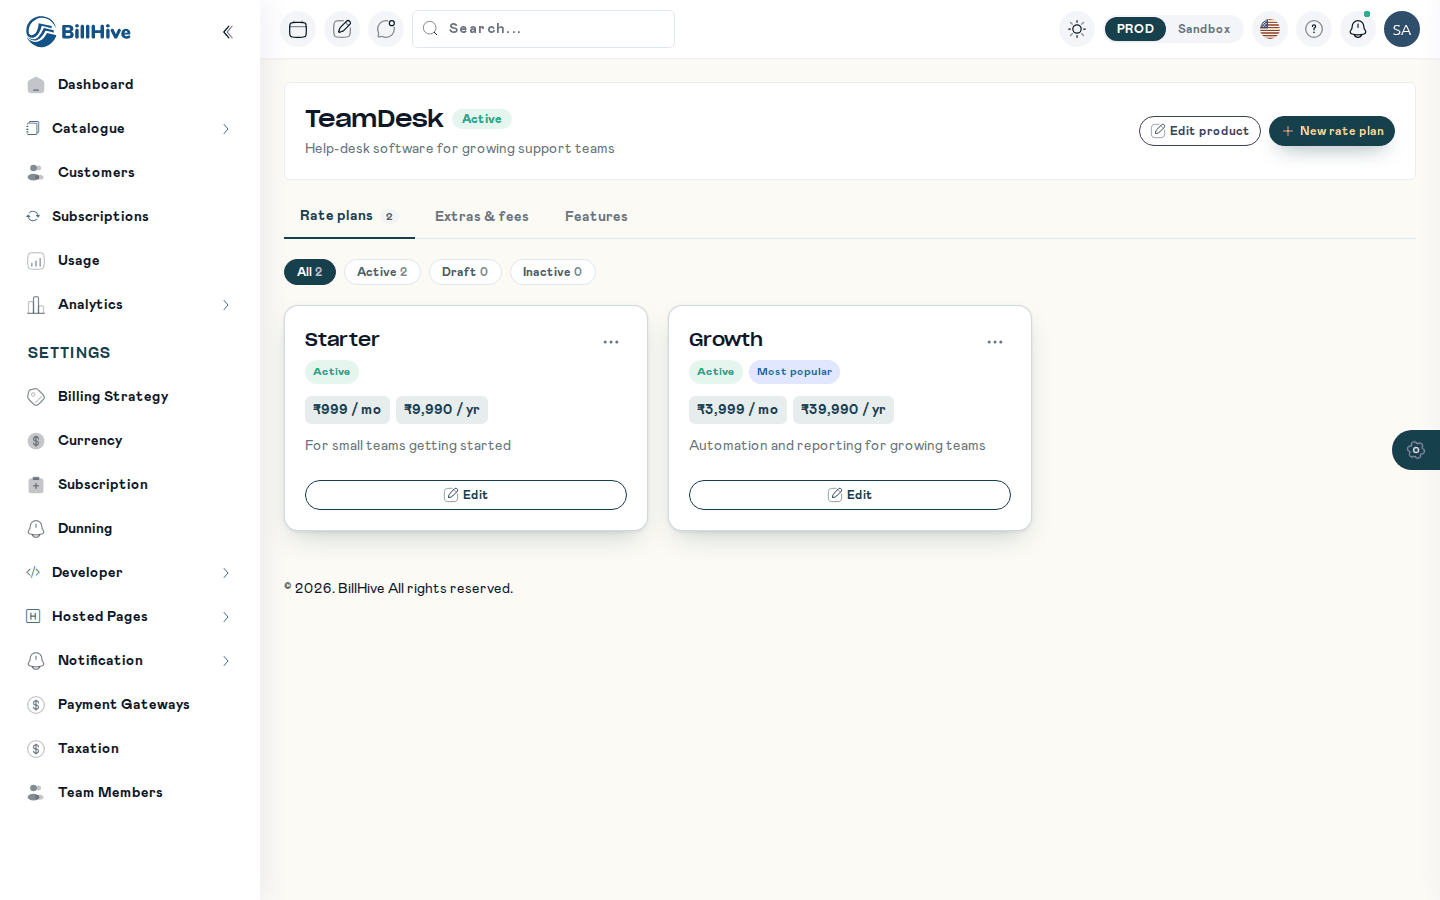
Your product page after adding plans.
A product is what you sell. A rate plan is a package of it, and a price says what the plan costs in one currency and billing frequency.
- Go to Catalogue > Products and click Add Product.
- Enter a name, e.g.
TeamDesk, and save. - On the product page, create a rate plan, e.g.
Starter. - Add pricing: currency
INR, billing frequency1 Month, a flat price of₹999. - Save and make sure the price is Active.
Details: Catalogue, Price Components.
Step 3: Create a Customer
- Go to Customers and click Add New.
- Enter the customer’s name, email, phone and billing address, e.g.
Acme Pvt Ltd,[email protected]. - Save.
Details: Manage Customer Accounts.
Step 4: Start a Subscription
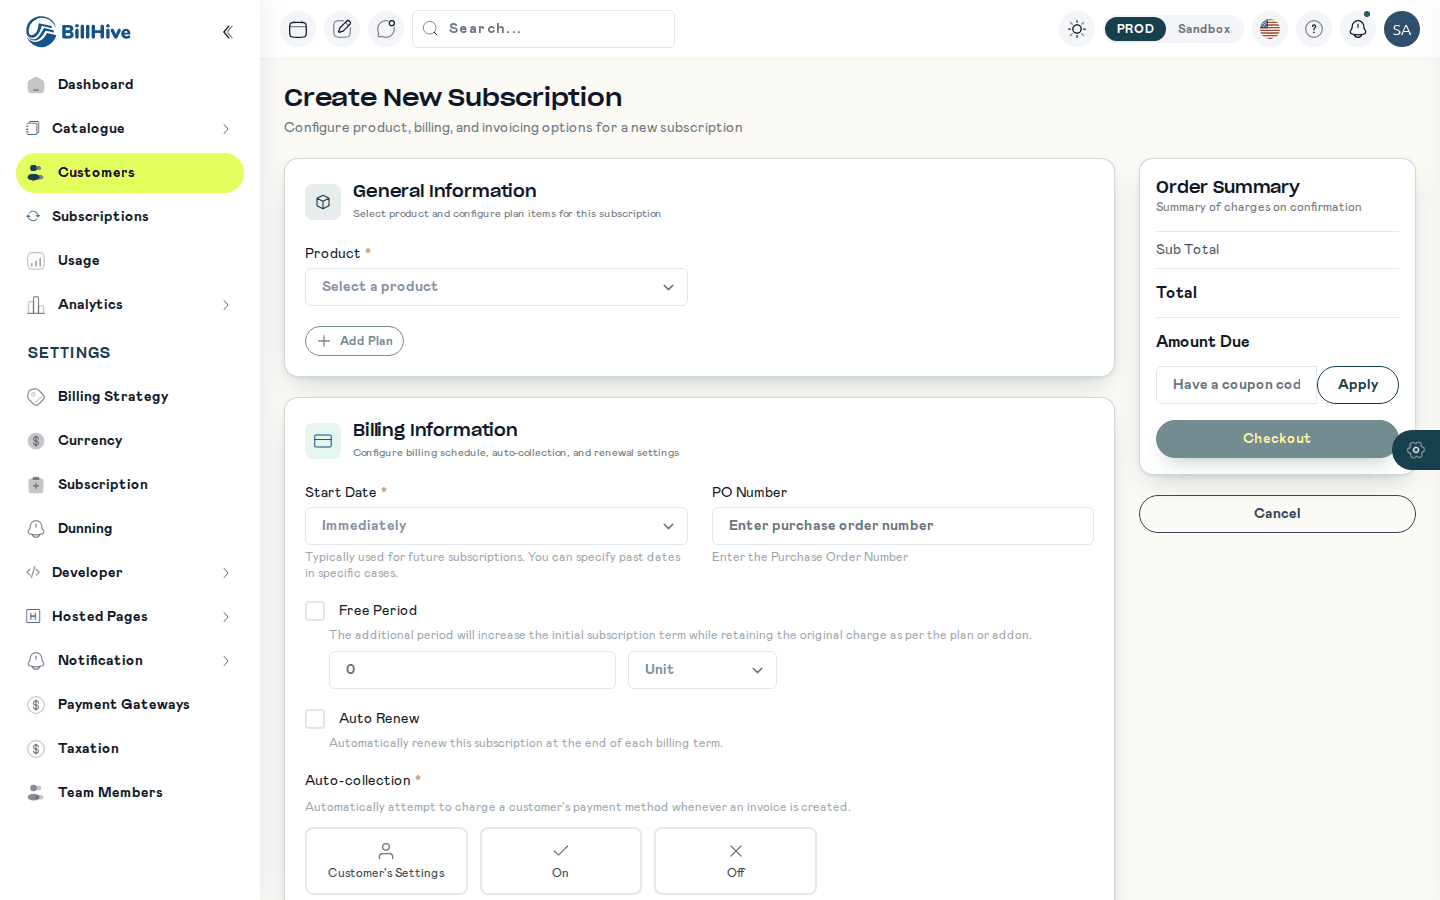
The Create New Subscription form.
- Open the customer.
- Click New Subscription.
- Pick the product, the
Starterplan and its INR monthly price. - Keep the start date as today.
- Check the order estimate: ₹999 + 18% GST = ₹1,178.82 if GST is on.
- Confirm.
The subscription appears on the customer page a few seconds later. Its status depends on the start date and how it is paid; see Activation.
Step 5: See Your Invoice
- Open the Invoices tab on the customer, or the Invoices list.
- Open the invoice for the new subscription to see its lines, GST, billing period and status.
That’s it: product, customer, subscription and invoice. Next, connect a payment gateway so invoices are collected automatically.
What’s Next?
Now that you have the basics down, explore further:
- Customers — Manage accounts, contacts, and payment methods
- Subscription Management — Trials, changes, pauses, renewals, cancellation
- Catalogue Builder — Pricing models, add-ons, offers
- Knowledge Base — The ideas behind subscription billing
- Billing — Invoices, adjustments, and credit balances
- Gateway Onboarding — Connect Cashfree